Decayed Master Sword 3D Print: Build Guide

With the release of The Legend Zelda: Tears of the Kingdom, we decided our next build had to be the decayed Master Sword. Luckily, we have been working on our own “Ultimate Master Sword” - combining all our favorite features from the various incarnation of the sword.


The Full “ Ultimate Master Sword “ Coming Soon!
This Ultimate Master Sword is nice, but it needs a little Malice.

Much better - now it is ready for printing!
Our Materials List
Here’s everything we used to print and finish our decayed Master Sword
Disclosure: Our recommended products contain affiliate links! If you end up making a purchase from one of the links below, we’ll receive a small kickback (at no cost to you) that helps support our channel and future products. We only recommend products we would (and do) use ourselves.
3D Printing
For the Main Sword
Polymaker’s PolyTerra PLA Filament
For the Gems
Finishing
Painting
You can also follow along with our build over on Youtube!
Step 1: Assembly

All the 3D printed parts ready for assembly
We designed this project to print with minimal supports and fit on a standard-size 3D printer (250mm x 210mm x 210mm). After printing each of the pieces for your sword we can get assembling. We’ll start with the blade – or at least what’s left of it.
Start by sanding the large flat surfaces of each part of the blade with 80 grit sandpaper. We want to rough them up to create more surface area for a better bond when gluing.

Next, glue the two flat surfaces together with super glue (or 2-part epoxy if you have more patience than we do). Our files have registration keys that fit standard 1.75 mm filament, making it easy to align the parts and give the bond a little more strength.

Shoutout to SuperDaftBros for turning us on to this method of designing 3D printing files with registration keys!
Repeat these steps of rough sanding, gluing, and aligning for all of the pieces of the guard. If you find any cracks or imperfections along the way, just fill them with a little spot fill putty.


Once you have all of the split pieces glued up and assembled, it’s time for our favorite step: sanding.
Step 2: Sanding & Priming
Our sanding process for 3D prints typically goes a little something like this:
Rough grit sand
Coat of 2-in-1 filler primer
Medium grit sand
Another coat of filler primer
Fine grit sand
You guessed it, another coat of primer
Final sand with fine grit and ultrafine steel wool
Repeat and adjust these steps until you’re happy with the finished product or get bored and decide to move on to the next step!

The more time you spend on sanding, the better your final results will be!
Step 3: More Assembly
Now that we have all of the pieces looking good, we have a bit more assembly to do.
Start by cutting your quarter-inch threaded steel rod to 18 inches long. This rod will eventually run through the blade and guard assembly to give it some extra strength and stability. This definitely isn’t necessary if you’re trying to save a few bucks, but it does give the finished sword a nice weight (and offers a nice handle to use while painting).

Install the steel rod with some two-part, five-minute epoxy. This will ensure the core is secure and won’t wobble around.

Then it’s time to assemble the rest of the handle and guard. Using a little more five-minute epoxy, slot all of the pieces together making sure everything is aligned properly.

Step 4: Painting
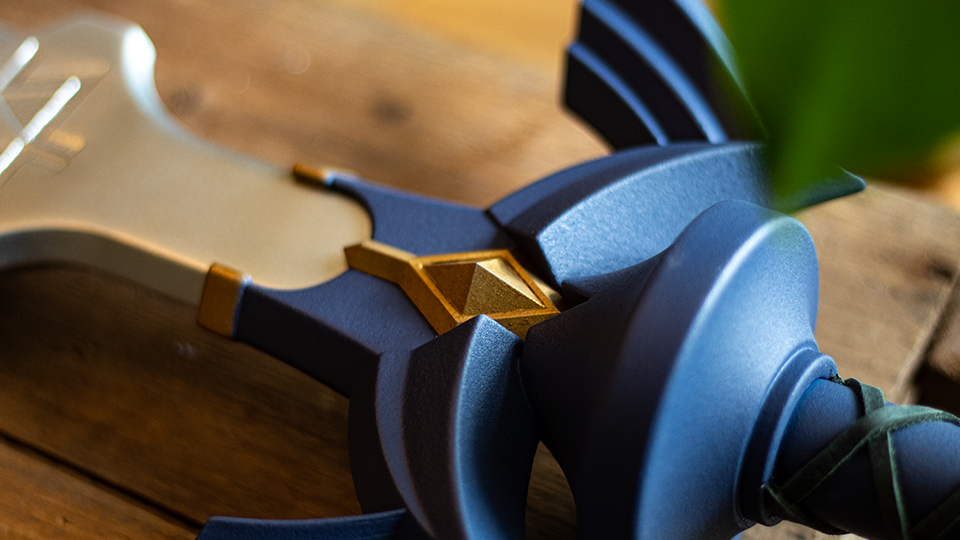
Start by giving the guard a coat of hammered metal texture paint. Don’t worry – this won’t be the final color, but it will give us a more interesting final finish and help cover up any remaining layer lines. Follow up your textured paint with a coat of blue/purple paint. This color took us some trial and error, but we’ve linked both colors we tried above so you can choose whichever color you like best.


We ended up going with Montana’s Irmgard Color - we think it is a perfect blend of blue and purple that fits this legendary sword!
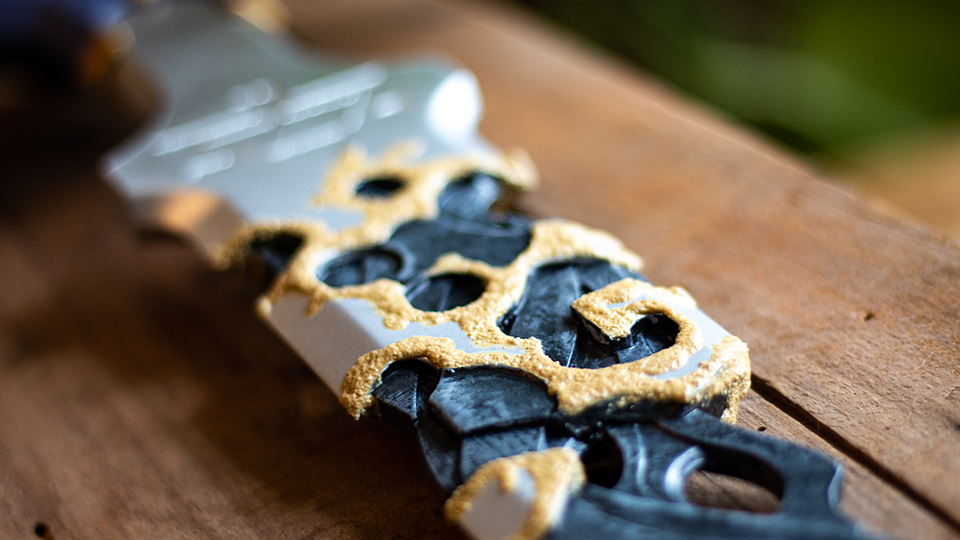
While the guard is drying, hit the blade with a coat of metallic silver.

Step 5: Weathering
At this point, our sword is looking good – too good to be called the DECAYED Master Sword. So it’s time for some weathering to match our in-game reference.

We started by adding a raw metal texture using Mod Podge tinted with black acrylic paint. Apply a rough coat in a thick, goopy layer to all of the recessed areas. Blot off any excess with a paper towel. It will take a few passes to build up the right texture.

Once the Mod Podge layers are dry, it’s time to go back in with some acrylic paint to highlight the texture we just created with some nice color variation. We used brown, black, and off-white paint with a dry brushing technique to bring out some of the geometry from the print.

For the rusty, grimy, decaying parts of the sort, we made another mixture, this time with Mod Podge, sand, and yellow paint. Slowly pile on the sandy mixture until you get the desired effect.

Step 5: The Handle Wrap
We really wanted to do a real leather wrap on the handle, so we designed our 3D printing files with grooves to help with placement.
Start by cutting four 13-inch pieces of 4 mm wide leather strapping. Attach them to the top of the handle with a little super glue and trim the angles as needed to get a good fit. The design is a basic over under weave. Take your time working your way down the handle, gluing the leather in place as you go. The technique may be simple, but the results are stunning.


Step 6: Finishing Touches
Before we do our final assembly, we have a few small details to handle, starting with the gems. The files are designed for FDM printers, but we spoiled ourselves with some resin prints, which meant minimal sanding. Then we applied a little gold Rub ‘n Buff for a nice metallic finish.

While you have the Rub ‘n Buff out, use the same gold for the small metal details on the handle. We recommend using a q-tip for a little extra precision.

Then, glue the gems in place on the guard assembly using five-minute epoxy.
Step 7: Final Assembly
With all of the finishing touches in place, attach the blade to the handle with five-minute epoxy and slide everything into place.

Final Thoughts
When we first saw the Tears of the Kingdom trailer, we knew we needed to make the decayed Master Sword. It feels so good to bring it into reality and we are really happy with the results. It was especially fun to make something that was essentially ruined and play around with new techniques and new textures to create something intentionally imperfect.


This was a super fun and satisfying build start to finish. Whether you’ve been 3D modeling and printing for years or you just purchased your first printer, you can achieve an awesome finished product like this one.
If you do build a decayed Master Sword yourself, be sure to tag us on Facebook and Instagram – we’d love to see what you come up with!
Download our decayed Master Sword 3D printing files from our website to get started on your build. (And keep an eye out for our ultimate Master Sword design files coming soon!)

And, if you enjoy our YouTube videos or our build guides, please consider supporting us on Patreon and have your name featured in our videos! Thank you for your support!