How to Make a Realistic, “Working” 3D-Printed Pokéball
Today we’re going to be making our most iconic build yet – the Pokéball from Pokémon. We’ve been huge fans of Pokémon since it first came to the US way back in 1998.
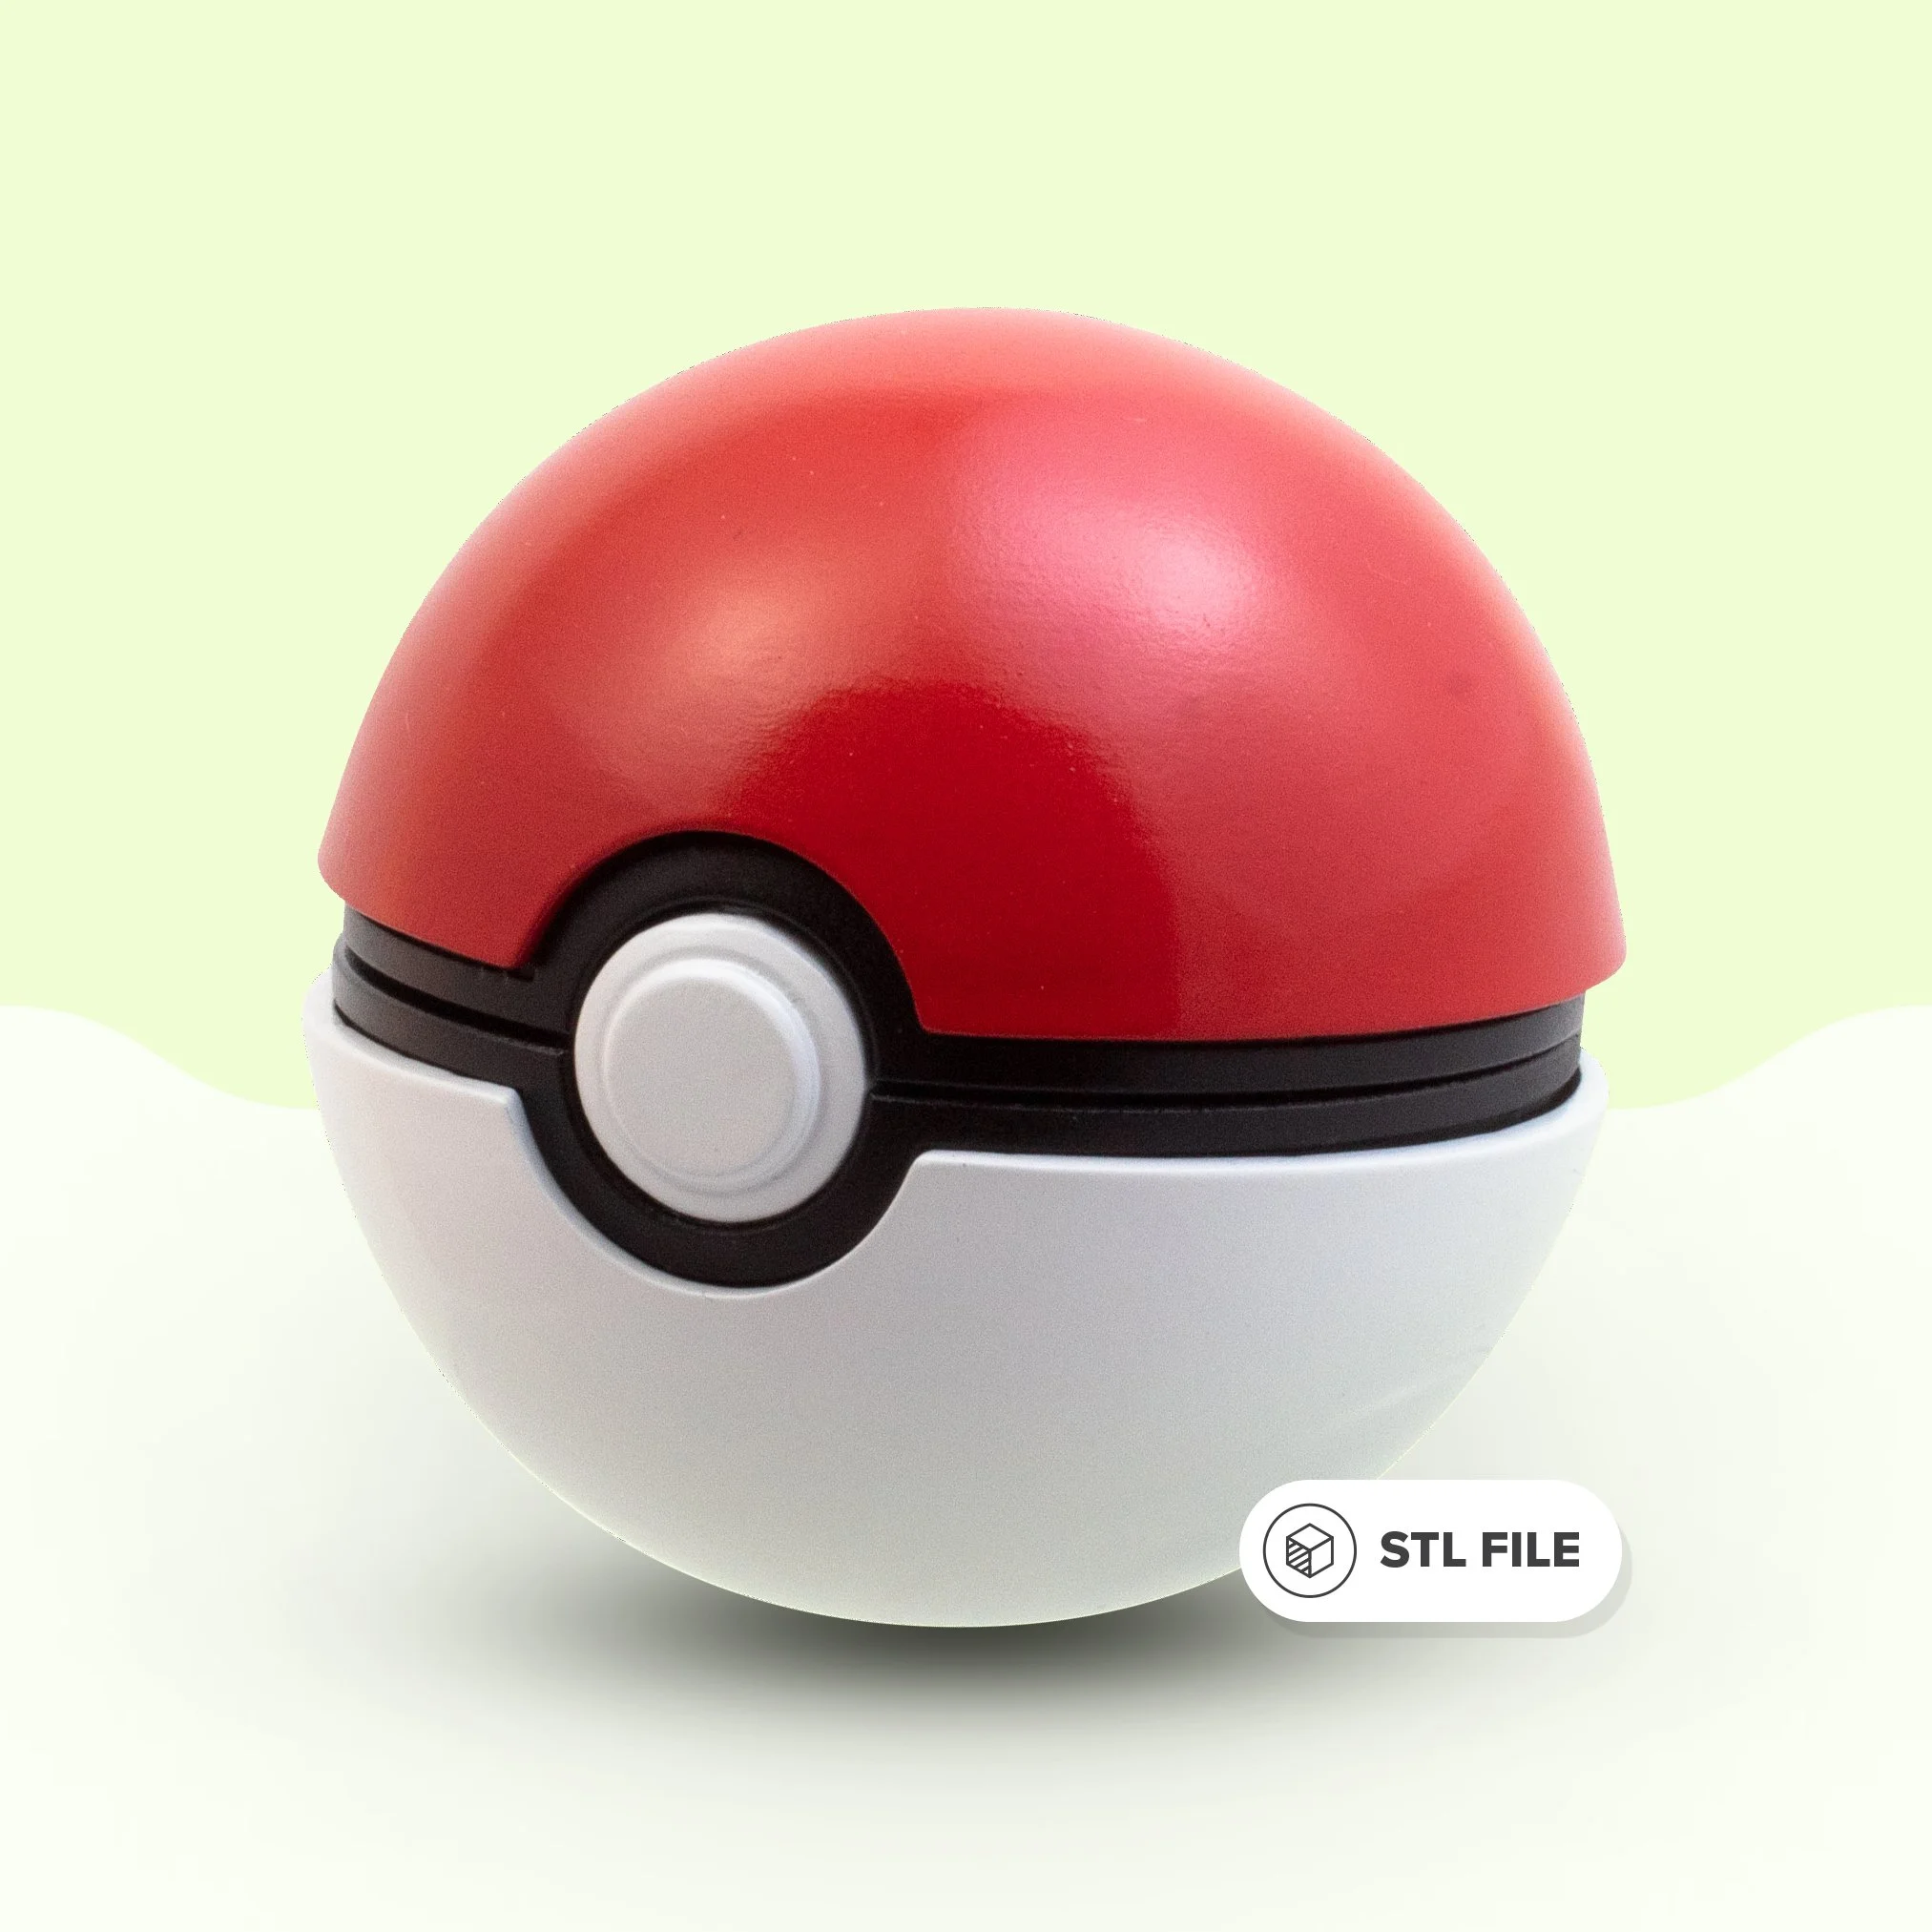
Our goal was to create a realistic-looking 3D-printed Pokéball that “worked” (i.e. opened and closed) even if it couldn’t truly catch and contain Pokémon. Check out how we designed, printed, and finished this awesome prop!

Our Materials List
Here is everything we used to print and finish our 3D-printed Pokéball.
Disclosure: Our recommended products contain affiliate links! If you end up making a purchase from one of the links below, we’ll receive a small kickback (at no cost to you) that helps support our channel and future products. We only recommend products we would (and do) use ourselves. Thank you!
3D Printing
Finishing & Painting
CA Glue (if you like breaking things as much as David does)
Magnets & Hardware
Step 1: Designing
While there are thousands of print files already available, for this project, we really wanted to model the Pokéball ourselves. It’s a simple enough design, but we still spent a long time getting this model just right (more on that later).
The Hinge
The core of our design was centered around finding the smallest, most compact hinge available. We ended up finding these tiny, brass hidden barrel hinges that are surprisingly sturdy.

The Size
Now that we found the perfect hinge, we needed to ensure that we had the correct spacing and sizing for the hinge to open and function properly. After a few mockups and test prints, we found a design that worked perfectly.
We jumped into Fusion 360 to flesh out the rest of the design, with a focus on making a 3D-printed Pokeball that felt like it could fit into the real world. You know, something that could shrink a Pokémon down to fit inside it.
After looking at a ton of reference images and making a few prototypes, we had our final design.

Step 2: 3D Printing
The design consists of an outer shell and an inner cage, which are printed separately to make painting a little easier. The cage also contains the hinge mounts, some additional fin details, and the small emitter disk.

Step 3: Sanding
We printed our Pokéball in resin, but we’re still going to do some sanding to make it perfect. We also broke a little part of the inner cage, so we’ll glue that back together with some CA glue.
Our focus will be on sanding down all of these little pips…because we may have gone a little overboard with my supports. Because these pieces are designed to nest into one another perfectly, we want to get them as smooth as possible.

We love using sanding sponges for projects like these because they conform to the shape of the print better than other more rigid sanding options.
We continued to check the fit of our pieces as we sanded to ensure we got everything just right.

Step 4: Priming & Prepping
With everything sanded, it’s time for painting. We started with a coat of filler primer – which admittedly, is a bit overkill, but will give us a nice smooth surface for painting. After the primer dried, we gave everything a quick pass with some steel wool. Then, we created supports using wooden skewers and a little hot glue to make everything easier to handle in the spray booth.

Step 5: Painting
First up, we have the inner cages, which we painted a flat black. Then, the fins are painted in metallic bronze (shout out to our Patrons for helping us pick the perfect color!). For the emitter disks, we chose Testor’s metallic emerald. And last but not least, the outer shells get a coat of red and white, respectively.

Once the paint was dry, we used a little isopropyl alcohol to remove the hot glue supports. We were really pleased with how well this worked, and will probably be using this method a lot more in the future.
Finally, we needed to deal with a few of the details on the inside of the Pokéball. The inside of the outer shells will show through the gaps of the inner cages. Based on most of the reference artwork we found, the inside of the Pokéball is filled with mirrors. To achieve this look, we’re going to use a few coats of Vallejo’s metallic silver paint.

Step 6: Assembly
We started by gluing the button to the inner cage with some two part epoxy. We designed a little notch to add a bit more structure for the glue to hold onto and to help with getting everything lined up.

Both the button and the inner cage opposite it have small recesses to receive a tiny magnet. We’ve linked the exact magnets we designed for above in our materials list, Make sure you double check that your magnets are facing the correct direction so that your Pokéball will snap shut properly.

Thanks to all of our sanding, the inner cage fits nicely into the outer shell. And yes, we are going with the button on the bottom as seen on the back of the Pokémon cards.

The fin and emitter disk snap together nicely and you’ll notice that the back of the emitter has a small square hole that aligns with the outer shell. This will help secure everything together and make sure the parts are lined up properly.


Before snapping everything together, we coated the outer shell with some more epoxy to hold everything into place. Then we can drop everything in, making sure all of the parts snap together.
Step 7: Finishing Touches
Before we get any further, we want to protect all of our hard work. We gave both halves a coat of clear gloss, which also makes the colors really pop.
Finally, we need to insert the hinges to make the Pokéball open and close smoothly. The hinges have small indents on either side, and there are small registration marks to make alignment super easy.

We don’t want our five-minute epoxy to get into any of the moving parts of the hinge. So, after mixing it up, we let it sit for just shy of five minutes. Then we carefully apply our semi-cured epoxy and drop the hinge into place, cleaning up any squeeze out. After letting the white half cure completely, we repeated the process on the other side, resisting the urge to close it until it was totally cured.
Final Thoughts
If you’re anything like us, you have wanted a real Pokéball like this one since you were a kid. It’s such a simple design, but it’s so iconic. While we still don’t have a real one, this 3D-printed Pokéball is pretty darn cool.
But, in true Make/Do fashion, after living with it for a few days, we decided we needed to remake the whole thing to fix one crucial issue.
The outer and inner shells weren’t nesting properly, causing the Pokéball to be more of a pill shape than a sphere. So, we made a new one!

It was a lot of fun to work through designing the interior and continuing to learn new modeling techniques to bring this project to life. If you’re interested in getting into 3D modeling, just pick a project and go for it! You’ll be surprised at how much you can achieve.


Download our 3D printed Pokéball files to get started on your Pokéball build
And, if you enjoy our YouTube videos or our build guides, please consider supporting us on Patreon and have your name featured in our videos! Thank you for your support!